You may need to move the local Vault view from its current location to another folder or drive for several reasons. Some common reasons include:
- Insufficient space on the local drive.
- Moving the vault folder for consistency across computers.
- Adhering to security policies that prohibit creating new folders in the root directory of the C: drive.
Important considerations when determining the Vault view location:
It is recommended to use the same location for the Vault view for all PDM users to avoid errors in links within non-SOLIDWORKS files. This may include Excel spreadsheets with external data references, third-party CAD files, etc.
For example, if User 1’s path to the Vault view is “C:\PDM Vault” and User 2’s path is “C:\Users\User 2\Documents\PDM Vault,” documents saved by User 1 with links to external documents in the Vault will cause errors when opened by User 2.
Option 1 – Use the “Clear Cache on Exit” option to free up space
If your vault contains a large number of non-SOLIDWORKS files with external references, consider an alternative approach, such as enabling the “Clear Cache on Exit” option for some or all folders in the vault. This will free up disk space by removing cached files that were not checked out by the current user. You can configure this option for each folder individually, so project libraries, Toolbox folders, etc., can be excluded from this option, preventing these files from having to be re-downloaded from the server each time they are accessed.
This setting can be enabled in the “Administration” tool at the Group or User level. If you are not a PDM administrator, contact your PDM administrator to make this change.
- Double-click the name of the Group or User.
- Select the “Cache Settings” node.
- Choose the root of the vault (or the relevant folders) and enable the “Clear Cache on Exit” option.
- Click “OK” to save the changes and close the Group/User properties screen.

Option 2 – Move the Vault View Location
If you’ve decided that moving the vault view is the right step, you need to follow three stages:
- Register all documents
- Delete the existing vault view
- Create a new vault view in the desired location
Register all documents
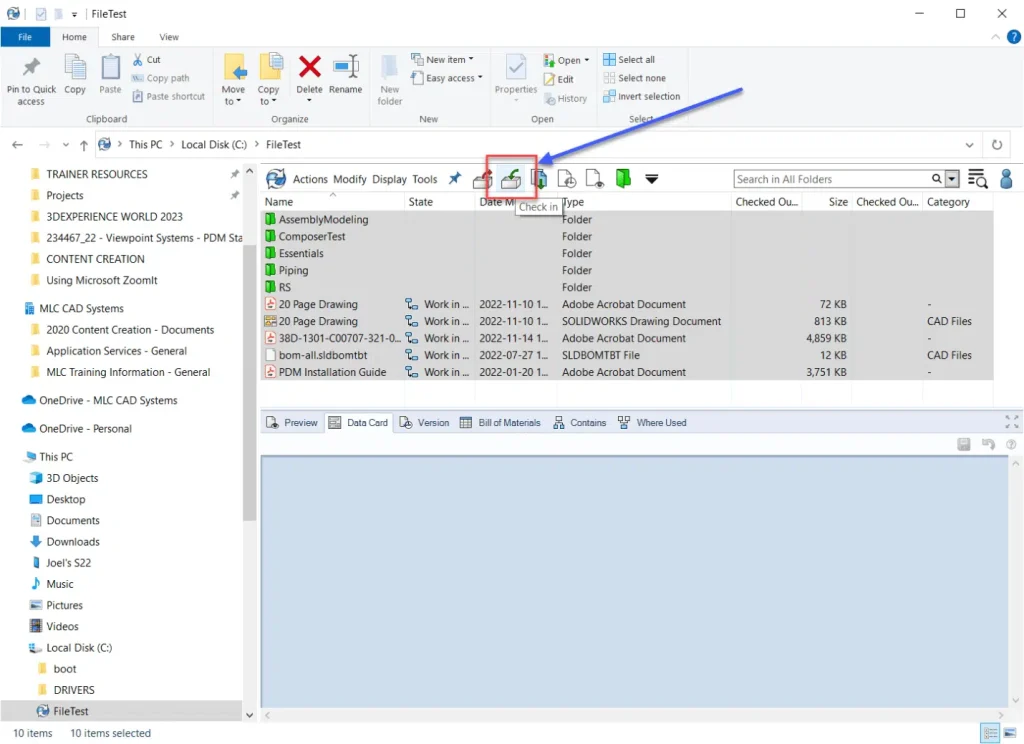
- In the root folder of the vault view, select all files and folders.
- Click the “Register” button.

Complete the “Registration” process
Ensure all files are fully checked in by repeating steps 1–2. If the following message appears, click “OK” and continue the process.

Delete the existing vault view
- Navigate one level up in Windows Explorer.
- Right-click on the vault view folder and select “Delete Vault View”.
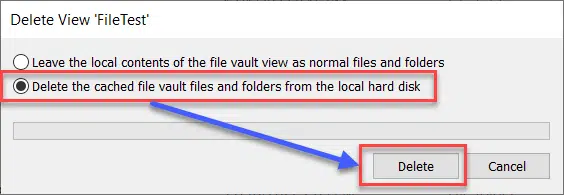
- Choose the option “Delete cached files and folders from the local hard drive” and click the “Delete” button.

4. Click “Yes” to confirm the deletion of all local files.

5. Click “Yes” to accept any User Account Control prompts that may appear.
6юYou may receive a message indicating that some files will be deleted after a reboot. Be sure to restart your computer and verify that the files have been deleted to free up disk space.
Create a new vault view in the desired location
In the Start menu, begin typing “View Setup” and select the “View Setup” app. Click “Yes” to accept the User Account Control prompt (this allows the app to run as Administrator, which prevents undesirable behavior).

Click “Next” to begin the process of creating the vault view.

If your server appears in the list, select it by checking the box and click “Next”.

If your server is not listed, click the “Add…” button to manually enter the server name and port number, then click “Next”.

Select the checkbox next to the vault for which you want to create a new view, and click “Next”.

Enter the path manually or click “Browse…” to select the new location for the vault view (note that a folder with the same name as the vault will be created in this location, so if you enter “D:”, your vault folder will be named “D:\PDM Vault” in this example).
Select the option “For all users on this computer” and click “Next”.

Click “Finish” to complete the creation of the vault view.

If successful, the status will change to “Completed”. Click the “Close” button to finish the process.

I hope this information was helpful to you! If you have any further questions, feel free to reach out for assistance via Telegram at @sergey_golinskiy or by sending an email to sngolinskiy@gmail.com. You can also contact me regarding setting up the PDM server or for training.

